To our EU Readers

To our EU Readers: We use cookies to ensure that we give you a good experience on our blog. If you continue to use this site, that constitutes your agreement.

Sunday, June 26, 2016

Father's day cards

I was in a rush to make a couple of  Father's day cards last weekend since I hadn't had time to get around to it before.  I saw this cute mountain card on Soapbox Creations and since my dad loves nature and the outdoors I thought it'd be perfect for him.  I got to work finding some clip art online and used my Silhouette portrait to cut out the mountains, "forest" of trees and sentiment.  If you'd like the cut file, leave a comment with your email address and I'd be happy to send it to you.  :)


For my Father-in-Law, the soda drinker, I came across this card with a soda can and thought of him.  So I found a soda can clip art and used my Silhouette portrait to cut it out as well as the text.  


So there you have it, two fairly quick and easy Father's day cards that got rave reviews.  Thanks for stopping by!


Monday, June 13, 2016

The latest

Hello again...
I've been away for awhile... we moved and I'm just getting set up in my new crafting space and getting around to uploading photos, etc. Hope your summer is off to a good start.  

I made this cascading card for my mom for Mother's day.  I can't seem to find the tutorial I used, but this one is very similar.

Dies used:  Stampin' up Floral Fusion, Little Leaves,  Framelits Label Dies


Next, I made this doughnut birthday card for my father-in-law who loves doughnuts.  I used  this card as my inspiration.  I saw a technique where you use press-n-seal wrap to help glue down small items, so I tried that for the "sprinkles" on the doughnut and it worked perfectly.  No glue all over my fingers or where I didn't want it on the card.  I just cut out a circle with my circle dies and a smaller circle in the center, repeated on a lighter shade of brown paper, and then used a scalloped circle to make the "bite" out of the doughnut.

 ...and lastly I made this for my brother's birthday.  I had been furniture shopping the day before and decided on a color scheme of navy and grey with a possible pop of yellow, so obviously I was still thinking in those shades when I made this card.  I found the tutorial for it here.


Stamps used:  Big Birthday Wishes set by Simon Says Stamp 


Thanks for stopping by!

Wednesday, March 16, 2016

Right at Home Blog hop

Yesterday I had my first experience seeing the Right At Home blog.  As long as I've been into stamping, I'm surprised I hadn't seen it sooner, but I liked what I saw.  I wanted to make a card for the blog hop challenge, using our favorite things (which isn't hard except for narrowing it down).  I love flowers, my silhouette portrait and layering, so this is what I came up with.  


I used W Plus 9 Pretty Peonies stamps for the flowers, cut the "Easter" greeting on my silhouette as well as the mason jar in vellum that I colored from behind with blue spectrum noir markers (otherwise the vellum completely blended in with the white background). I love Easter and all the spring flowers I am seeing all over the place these days.  

Thanks for stopping by!


Thursday, March 3, 2016

Springing into March

Hello there!  Just thought I'd share some of the latest cards I've been making.

This is basically a case from this card.  Love those candles!  :)


This is an older Sweet Pea stamp that I decided to try watercoloring.


I saw a video tutorial for this one and basically cased it in a different color scheme.


That layout led to this card...

 and this one...


And this one....


This Rhododenron stamp seemed perfect for copic coloring and layering.  I cut out the middle portion of the flower, then the next clump of flowers, and the next, followed by the leaves.


This card features Altenew's painted flowers.  I decided to try it in a wreath form.


And lastly this vase of tulips just reminded me of spring.


Thanks for stopping by!


Wednesday, February 24, 2016

Vellum Pocket Cards

Hello,  I'm back again today with some more pocket cards.  I seem to be on a kick with them lately trying new things, and today it is vellum.  I haven't used vellum very much in my card making the last few years but wanted to use it again.  And with these pocket cards, it's so easy.  For the free cut file for the pocket card, click here.  And for my other posts about pocket cards and tutorials, go here, here, here and here.  I ended up cutting the tags by hand this time and only rounding the top corners since they show through the vellum, but the cut file has rounded corners for the tag.


As you can see, they are fairly simple.  I plan to write on the back of the tag in white since the front of the tag is decorate to show through the vellum.  


 For the one below, I put a band of paper around it before adhering a Martha Stewart sticker label with a stamped sentiment.


So there you go, some easy 5-10 minute cards that look more impressive than all that.  Gotta love that!  
And remember, if you don't have a silhouette cutting machine, there are directions on cutting out the template on the links above.

Thanks for stopping by!


Saturday, February 20, 2016

St. Patty's day shaker card with free cut file

I'm back today with the St. Patrick's day pocket shaker card.  I have the free cutting file to share with you as well.  I made the base of the card in white just because that was what I was practicing cutting the cut file on, but you could do it in green instead and skip the patterned paper to simplify.  I just happened to have some cute green patterned paper I was dying to use.  :)


If you don't want the shamrock on the card, there is a plain cut file on this post.  See this post and this one for more pocket card ideas.

Click here for the free cutting file.

Thanks for stopping by!


Thursday, February 18, 2016

Penny Black Birthday Hedgehogs

Today I have a cute hedgehog card to share with you. This is an older stamp that I hadn't used in a while but decided to try again now that I have better blending markers.  I used Spectrum Noir markers since I don't have Copics, but you could use whatever you have on hand.  


I used fun foam under the white embossed part of the card so it would have some dimension but still stay flat in the mail.  I added a few sequins from Simon Says Stamp to finish off the card.  

stamps used: Party Pooped (Penny Black)
sentiment is from $1.00 stamp bins at Walmart

Thanks for stopping by!


Pocket card with free cut file

Hello again,

I'm back to share another pocket card with you today.  I have previously shared a few different styles, but the other day while I was on my morning walk thinking about something new to try, I thought It'd be fun to make a pocket shaker card, and while I'm at it, why don't I just make a cut file to make it easier to replicate (don't know why I didn't think of that sooner).  So I have the cut file to share with you today (for a basic pocket card).  If you don't have a silhouette cutting machine or equivalent, you can go to this post for the instructions on cutting the paper to the right dimensions.

The previous times I've made these pocket cards,  I used double sided patterned paper.  but this time I decided to try something different and use a white base and decorate the front like a regular card.  I used an embossing folder to emboss just the front portion of the pocket before assembling it.  I also decorated the tag for fun.  


For the free cut file to the pocket card, click here.

I'll be back soon with the shaker card and cut file for that as well... thanks for your patience.  :)  


Thursday, February 4, 2016

Feeling the love

I just wanted to share with you today this simple card showcasing some adorable heart paper.  I made a frame with my silhouette portrait and cut out the hearts with dies.  


I am loving this new sheet music embossing folder I found at Joann's last week- less than $2.00 a piece right now.  That's a deal!  I taught piano lessons for 10+ years so I still have soft spot in my heart for anything music-related.  


Thanks for stopping by!

Monday, February 1, 2016

Love is in the Air

Can you believe it's February already?  Where did January go?  I just have to share the birthday cake that I made for my kids birthday last week (yes, my kids share the same birthday- how fun is that?!) My daughter asked for a carousel cake, and I'm not much of a cake decorator, but I gave it my best shot.  ;)  


Ok, back to cards now.  I wanted to try some of my older stamps in new ways.  Can you tell I got on a "frame" kick lately? 


 The inspiration for this one (basically cased) is from here.  Never thought of using the bunnies for anything but Easter, but glad to find more ways to use them.


These cards both use the same "poised poppy" stamp but in different ways.  I found my inspiration for the first one here and the second here.


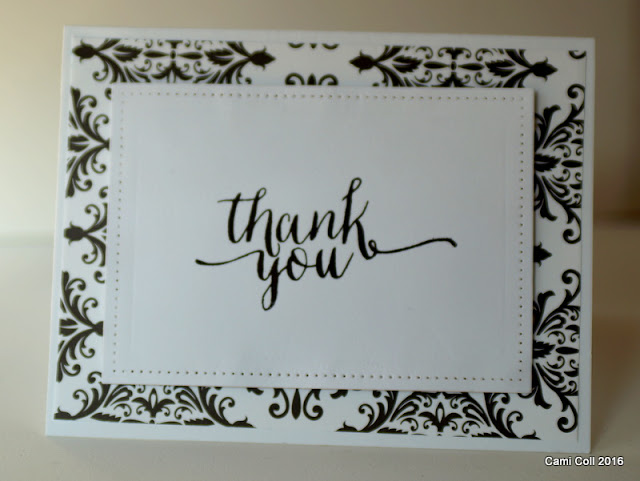
This is just a simple but classy Thank You note... always need more of those...


And a birthday card for the sports lovers (have many of those in my extended family). 


And for something a little different, a thank you with French inspiration.  


 I have also been having some fun making some Valentines since it's coming up in a couple of weeks.  This first one is for my hubby and his late grandfather was a pilot.  I basically cased it from here.


This one I decided to try some raccoon stamps I've had for a couple of years and never used.  I put a punched out heart in the bigger raccoon's paws to tie in with the Valentine theme. 


Thanks for stopping by!


Tuesday, January 5, 2016

Happy New Year!

I hope you had a Merry Christmas and are enjoying the new year so far.  Can't believe it's 2016 already... I used to just have trouble remembering to write the new year on my date from the previous year, but the other day I was thinking way further back than 2015.  Sleep deprivation will do that to you.  ;)  

Had to try out some of the new stamps I got bought myself for Christmas.  (Had to take advantage of Black Friday sales when I had the chance, right?  Please tell me I'm not the only one...)  Anyway, I digress...

WPlus9 has some great stamps if you're into the watercolor techniques.  I like that you can use stamp pads with them, or markers, or watercolor, or however you want to do it.  Options are good... :)

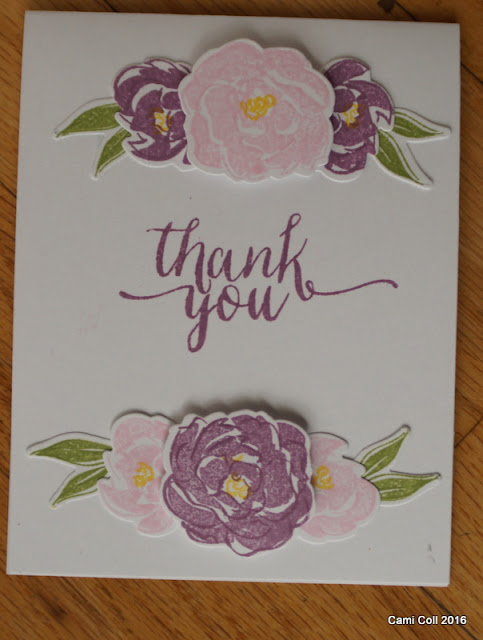
I have seen some of these fun layered ones so I had to give it a try.  It's not always easy to get the image to stamp correctly on both the card base and the pieces going on top, but luckily for the clear stamps you can stamp the image more than one time if needed.  


Stamps:  Pretty Peonies- WPlus9

Hand-lettered Thanks- WPlus9
Dies:  Label dies- Stampin' Up

These stamps also have coordinating dies which make them so fun for layering.  I got the inspiration for this card here.  


Stamps:  Pretty Peonies- WPlus9

Hand-lettered Thanks- WPlus9

I wanted to get going on some Valentine cards since February isn't that far off the way things have been going lately...  I saw this great tutorial for a shaker card by the amazing Jennifer McGuire and had to give it a try with what I had on hand.  Go here for the video/inspiration card.  

XOXO- Rub-on (no longer available)
Love- Silhouette cut-file
Dies:  Heart Die- Clear & Simple Stamps, Shapes:  Hearts (Combo)
Label die:  Stampin' up!
Embossing folder- Arrows - Darice

Love how you can see all the way through the card and yet still have a shaker card.

( Inside of card )

 This one was pretty much cased from the talented Heidi Boos here.  


This card uses a cut file from the Silhouette Design Store.  Needed a b-day card for my niece.  


And while I was at it, a card for a nephew.  
  
 Stamps:  Beep Boop Birthday by Lawn Fawn

This card features I set I got last spring- Altenew's Painted Flowers.  It is kind of similar to the WPlus9's Pretty Peonies, but the outlines of the flowers are very different so it can be used in different ways.  I love how elegant it looks and that it can be used for a variety of occasions.   My inspiration for this card started here.

Stamps: Altenew Painted Flowers
Hero Arts sentiment 

Here is another card using the same stamp set.  The inspiration from this one came from here.


And last but not least, one more card using the WPlus9 Pretty Peonies set once more.  This was my first try using the stamps.  I love black and white striped paper--just sayin'. :)


Thanks for stopping by today!  Did you get any new stamp sets for Christmas?  Please share!