To our EU Readers

To our EU Readers: We use cookies to ensure that we give you a good experience on our blog. If you continue to use this site, that constitutes your agreement.

Monday, January 5, 2015

Long Pocket Card Tutorial

Well, it's taken me awhile, but I finally have a pocket card tutorial for the long pocket card.  For the regular card size, go here.  On my original post about the long pocket card, I explained how I had a lot of pretty business sized envelopes, so I decided to come up with a card that would fit in those envelopes.  To see my Christmas themed long pocket cards, go here.


Here is a pocket card I made for Valentine's day.

For this, you will start with a piece of cardstock 8 1/2" by 9 1/2."  You will score on the 8 1/2" side at 4" and 8".  You will score on the 9 1/2" side at 1/2".  Here is what the paper looks like when it is scored.


 I then folded on all the score lines to decide where I wanted the front of the pocket to be.  I then removed the bottom left and bottom right pieces (see below) by cutting them out.
 If you like the fold down flap of the Valentine card above, then you can simply score at 1/2 inch or 3/4 inch below the top of the pocket.  However, with this card, I decided to make the pocket have a rounded top like in the style I did at Christmas time for the regular card-sized pocket.  I took a CD and lined it up about half way on the top of the card.
 I traced the arc with a pencil...

 This is what it looks like when that portion was removed.
 Here is the pocket unfolded so you can see how that portion is removed.  I also cut the right side down so it won't show when the pocket is folded down.
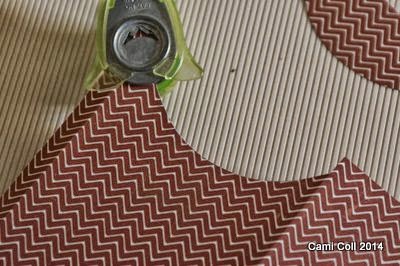
 Then I used a corner rounder to make this:
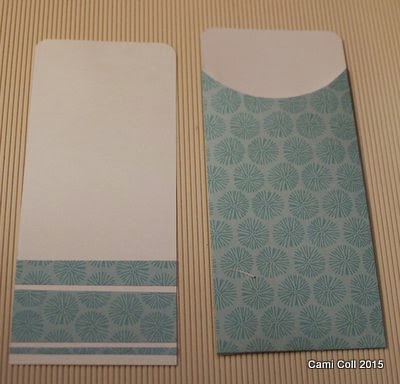
 The pocket is now ready to decorate.  I decided to add some stripes of the same paper to the tag which will go inside the pocket.  The tag is 3 3/4" by 8 3/4".  I rounded the top corners but left the bottom corners intact.  

Here is how it looks decorated:


I used some "Pebbles" Birthday Wishes diecuts for the cupcake and "let's party" banner.  The other banners are the Stampin' Up Banner punch.  The sentiment, Happy Birthday, is a Pebbles Rub-on.  I just happened to have a small cupcake sticker that matched the large cupcake so I used that on the tag to coordinate.


Here are some other cards I've made lately:


This one also uses the Stampin' up Banner punch and another rub-on from Pebbles


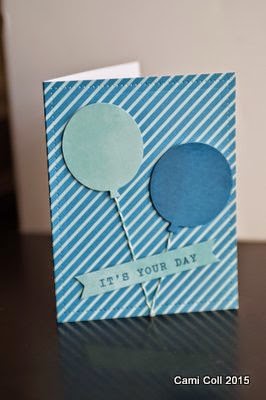
This one used more diecuts from Pebbles Birthday Wishes and some bakers twine for the balloon strings


Just can't get enough of banners lately! :) 


 This one I found and cased from here.  I didn't have the exact same papers or stamps so I did my best to work with what I had.  

Thanks for stopping by!


Saturday, January 3, 2015

Happy New Year 2015!

I thought I'd start the new year out with some thank you cards since I needed to make some for the Christmas gifts we received.  I came across my stash of rub-ons and decided to use those for some of my cards.  As much as I like stamping, I like the no-clean-up-reqired easiness of using  a rub-on.

flower die- Floral Fusion (Stampin' Up)

 Banner punch- Stampin' Up, Label Die, Stampin' up


Thanks die, Simon Says Stamp

I love this bicycle die and especially in red- I always wanted a red bike as a kid and finally got one as an adult.  :)

Monday, December 1, 2014

Christmas Cards

Now that it's finally after Thanksgiving I don't feel so bad about ONLY making Christmas cards for the next little while.  I still have a ways to go, but wanted to share some of the latest.

I decided to play around some more with the pocket card idea.  I have several metallic letter-sized envelopes I never use...so I thought I'd make a letter-sized pocket card as well. (Tutorial coming soon!)


I also finished up some of the smaller ones I was working on (tutorial for these here)


I'm having so much fun with my Silhouette portrait!  If you are thinking about getting one, I highly recommend it.  I love that you can download all the free fonts online and then cut them out with the Silhouette.  Such fun!

The inspiration from this card came from here.


I am adding to my collection of Spectrum Noir markers, so I couldn't wait to try something with red and green.  I love these markers, and the fact that they are so much less expensive than Copics!


Here is a simple card with the true meaning of Christmas.  I love Nativity Scenes and have been collecting them for years.  One of my favorites is an igloo with eskimos from Alaska where I served as a missionary a few years back.

This is a very simple one using two dimensional stickers.  I just drew in some gold lines to make the ornaments hang, and cut the text out on the Silhouette.

Thanks for stopping by and have a Very Merry Christmas!


Tuesday, September 30, 2014

Pocket card variation (with tutorial)

Today I have another version of the pocket card to share with you.  This one has a fold down flap in the front instead of the curved front I shared a couple of days ago and it's even easier to make!  


To start with, you'll need a piece of paper (double sided patterned works well) 8 1/2" x 5 3/4".


Turn the paper horizontally and using a scoring board, score down at 3/8" and 4 1/2" .

Then turn the paper vertically and score at 5/8".


Next you'll score at 5" just down to the line you made at 4 1/2" horizontally.  (This will create the fold down flap in the front).


Then you'll cut off the tiny top corner where two flaps meet, the tiny bottom corner where two flaps meet, and the portion on the right bottom side where the 4 1/2" score line and 5/8" score line meet.  Cut down the 4 1/2" line just until you meet the top horizontal line.  That will create your fold down flap for the front.  Here's what it should look like when you've done all these steps (the last one isn't visible in the picture):


Next you'll use a corner rounder and round all the corners (flaps included) except the bottom right corner.  You'll need to fold your flaps in to get to various corners to use your corner rounder.  I left the front flap folded downward.  It will look like this:


Next you're ready to assemble the pocket with adhesive.  I used scor-tape.  You could use sticky strip or whatever you prefer, but I tried the snail adhesive previously and it wasn't strong enough to hold the flaps closed.  You can either have the flaps hidden or showing.  I preferred hidden, like this:


Here is the front of the pocket, ready to decorate


The tag is simple- just a piece of cardstock 3 3/4" x 5" with the corners rounded.  I used a 1 1/2" circle and 1" circle of plain or patterned paper for where the ribbon goes through.  I scored each of them down the middle, put adhesive on the back and centered them on the tag.  Then I hole-punched through and added my ribbon.  For this one I used two solid papers:


For this tag I used the same papers as the pocket.


You can see that these pocket cards can be used for any occasion or theme.  Have fun!  Here are some more I've made lately...


Thursday, September 25, 2014

Pocket Card Tutorial with free cut file

Today I'm excited to share with you a pocket card tutorial.  On a previous post, I shared a couple of pocket cards I made for Christmas.  I realized those were pretty small for normal card envelopes, but they fit perfectly in some extra smaller envelopes I had around from a previous Christmas.  So I decided to make a new template that fits better in a normal card envelope.  Due to my lack of math skills, it took a few tries, but here is what I came up with.  This is also my first picture tutorial so be patient with me. :)

[UPDATE: I created a free silhouette cut-file, click here]

Here is the finished card...


To start with, you'll need a piece of paper (double sided patterned works well) 8 5/8" x 6".

Turn the paper horizontally and using a scoring board, score down at 3/8" .


 Next, you'll score at 4 1/2"


 Then turn the paper vertically and score at 5/8".


Then you'll cut off the tiny bottom corner where the two flaps meet, and the portion on the right bottom side where the 4 1/2" score line and 5/8" score line meet.  This will create your flaps to close the pocket.


 Next you'll fold on the 4 1/2" score line (using a bone folder if you'd like).  You can also fold in the side and bottom flaps.


Now to create the curve in the front, I used a CD. You could use a circle die if you have one large enough (I didn't).  Or anything round (plate, lid, etc).  You can make the curve close to the top or further down depending on your preference.  I wanted some of the tag to show, so I put it down a couple of inches and then traced the bottom edge of the CD.


Next I cut off the part I just traced, with a straight line across the left flap and up the right side.  Keep this piece of paper for the tag that goes inside the pocket.


 Next we'll round the corners.  Start with the top of the left flap, then the bottom of that flap (you'll need to fold the bottom flap up to get the corner rounder in there).

Then you can do the bottom flap...


...and the top(back of envelope). Here's how the top will look once that is done.


Next we'll put some sticky strip or (scor-tape like I used) on the flaps.


Go ahead and remove the backing, and fold down the flaps.  This is the back of the pocket.  You could either have them showing like I do (hard to tell in the photo, sorry) or hidden like in other example below.


The pocket on the right has the flaps tucked inside, where the one on the left has them outside (visible).

Ok, so now you have your pocket, and you can decorate it however you choose.  
I decided on this one to put a snowflake in the corner.  It's actually two snowflake punches stacked on top of each other, with a pearl sticker on top.  I put a dimension dot on the bottom and in between the snowflakes for some height.  I also ran both snowflakes through the Big Shot with my Stampin Up! Chevron embossing folder.


Next comes the tag that will go inside the pocket. For this, you'll need a piece of cardstock 5 1/4" x 4".  I rounded the corners, then put a 1 1/2" circle of one patterned paper covered with a 1" circle of contrasting paper and folded in half over the top edge.  I used the scrap of paper left over after the CD tracing step for the circles.
Then I hole-punched through the center of the half-circles and added a ribbon. 
  

Another idea I tried is only rounding the top corners and then using an edger punch on the bottom.  This is a scroll punch from EK Success.


You can add a sentiment like I did on this one (oh, and I did a Christmas tree in the corner of this one)...


 ...or this one... (with a poinsettia sticker on the front).


Here are 3 finished pocket cards.  You can see the possibilities are endless, and can be used for any theme.  I think I'll try some for fall next...


 Thanks for stopping by, and please leave a comment if you enjoyed this.  I'd love to see your creations as well.